 Save
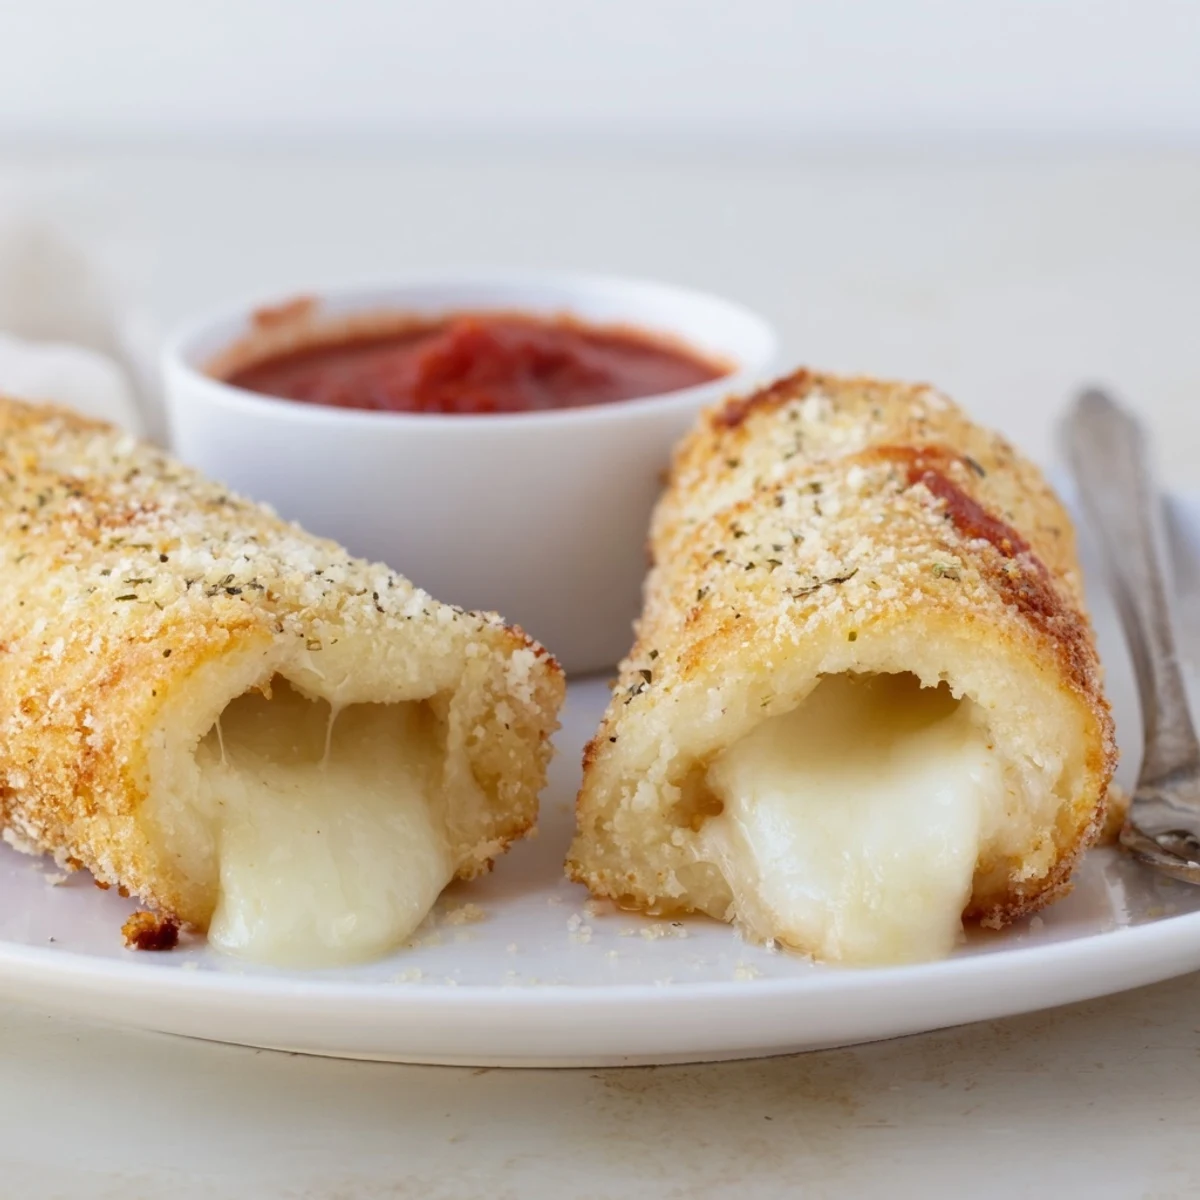
Save Flatten white sandwich bread, place a mozzarella stick on the edge, roll tightly and seal with melted butter. Brush the outside, sprinkle a mix of grated Parmesan, garlic powder and Italian herbs, then bake or pan-fry until deeply golden and crisp, about 8–10 minutes. Try panko for extra crunch or add thin ham slices for a savory variation. Serve warm with marinara or favorite dip.
The first time I made these Crispy Cheesy Roll Ups, I remember the sudden sizzle and delightful aroma that filled my little kitchen as butter hit the skillet. Nothing draws a crowd quite like the promise of melted cheese wrapped in something golden and crisp. I wasn't aiming for anything fancy—just a quick snack on a rainy afternoon that felt a little too quiet. Those roll ups had a way of disappearing the moment they cooled enough to touch.
One weekend, my friends stopped by unannounced—muddy shoes, boisterous laughs, and all—and these roll ups were my secret weapon for keeping everyone happy while we caught up around the table. It turned into an impromptu tasting session, everyone trying different dips and sharing hot, crispy bites between stories.
Ingredients
- White sandwich bread: Go for soft, fresh slices – staler bread just doesn’t roll as neatly, and removing the crusts makes all the difference for that seamless crunch.
- Mozzarella cheese sticks: These bring that satisfying melt and pull, but cheddar works for a sharper twist (just watch for oozing if you overfill).
- Melted butter: Brushing every nook gives that addictive golden finish, and I’ve found a pastry brush really helps get even coverage.
- Grated Parmesan cheese: A dusting before baking amps up the savory flavor and crisps beautifully in the oven.
- Garlic powder: Just a hint rounds out the flavor without overpowering the cheese, so use a light hand.
- Dried Italian herbs: These add a subtle aroma—I've tried both oregano and basil and love the depth they bring.
- Salt and pepper: Always taste the cheese first; some are saltier than others, so season to your preference.
Instructions
- Get everything ready:
- Preheat your oven to 400°F (200°C), or set a nonstick skillet over medium heat if you prefer to pan fry. Line a baking tray with parchment for easy cleanup, and have your tools handy.
- Flatten and prep the bread:
- Use a rolling pin to gently flatten each bread slice until it’s about 1/4 inch thick—this helps it wrap snugly around the cheese.
- Add the cheese and roll:
- Place a cheese stick along one edge of each bread slice, then roll tightly from that edge, sealing with a dab of melted butter to keep everything together.
- Brush and coat:
- Brush the outside of each roll up all over with melted butter so they’ll crisp up evenly.
- Season to perfection:
- Mix Parmesan, garlic powder, and Italian herbs together, then sprinkle this mix generously over your buttered roll ups.
- Arrange for baking:
- Place the roll ups seam side down on your prepared tray so they don't unravel, leaving a little space between each.
- Bake (or fry) until golden:
- Slide the tray into the oven and bake for 8–10 minutes, or pan fry, turning with tongs so all sides get crisp and golden.
- Serve and savor:
- Let them cool just long enough to grab, and serve warm with your favorite dipping sauce—marinara is a classic choice.
 Save
Save There’s a certain joy in watching someone take that first crunchy bite, and the best was seeing my niece’s eyes go wide at the stringy cheese—suddenly, she insisted on making her own batch the next weekend.
Creative Ways to Serve
I found that a platter of these roll ups vanishes twice as fast when you offer a few dips on the side—marinara, honey mustard, or even a spicy ranch keeps everyone reaching for seconds.
Kitchen Swaps and Twists
Don’t be afraid to stray from the recipe—add a bit of deli ham or turkey before rolling, or sprinkle a hint of smoked paprika for depth. Once, I used whole wheat bread and it worked surprisingly well, adding a nutty flavor.
Quick Fixes for Busy Days
When you’re short on time, prepping everything in advance can make these a ten-minute miracle. I’ve pre-rolled them and kept in the fridge until friends arrived—and no one guessed they weren’t made on the spot.
- If you use pre-shredded cheese, pack it tightly to minimize gaps.
- Don’t forget to seal the edge or you’ll lose your cheesy treasure mid-bake.
- Leftovers, if any, reheat best in a toaster oven for max crispness.
 Save
Save There’s nothing quite like sharing something crispy and cheesy with friends or family—these roll ups never fail to spark grins around the table.
Recipe FAQs
- → Can I use other cheeses?
-
Yes—mozzarella gives the best melt and stretch, but sharp cheddar or a mix of cheeses will add flavor. Use firm sticks or cut thicker slices to prevent leaks.
- → How do I keep the rolls from unrolling?
-
Press the seam firmly when rolling and seal with a thin smear of melted butter. Place seam-side down on the tray so the heat helps keep them closed while cooking.
- → Is pan-frying an option and how long to cook?
-
Pan-frying works well: heat a nonstick skillet over medium, add a little butter or oil, and turn roll ups until all sides are golden and crisp, about 6–8 minutes total for even browning.
- → How can I make them extra crispy?
-
Roll the bread-coated rolls in panko breadcrumbs before baking or fry briefly in shallow oil. A hot oven (around 400°F/200°C) also promotes a crisp exterior.
- → Can these be prepared ahead of time?
-
Assemble and refrigerate on a parchment-lined tray for up to a day, then brush with butter and bake just before serving. Avoid assembling too far ahead to prevent soggy bread.
- → Any tips for serving and pairings?
-
Serve warm with marinara, ranch, or a spicy tomato dip. Add thin deli ham or turkey inside for variety, and cut into smaller pieces for bite-size appetizers.