 Save
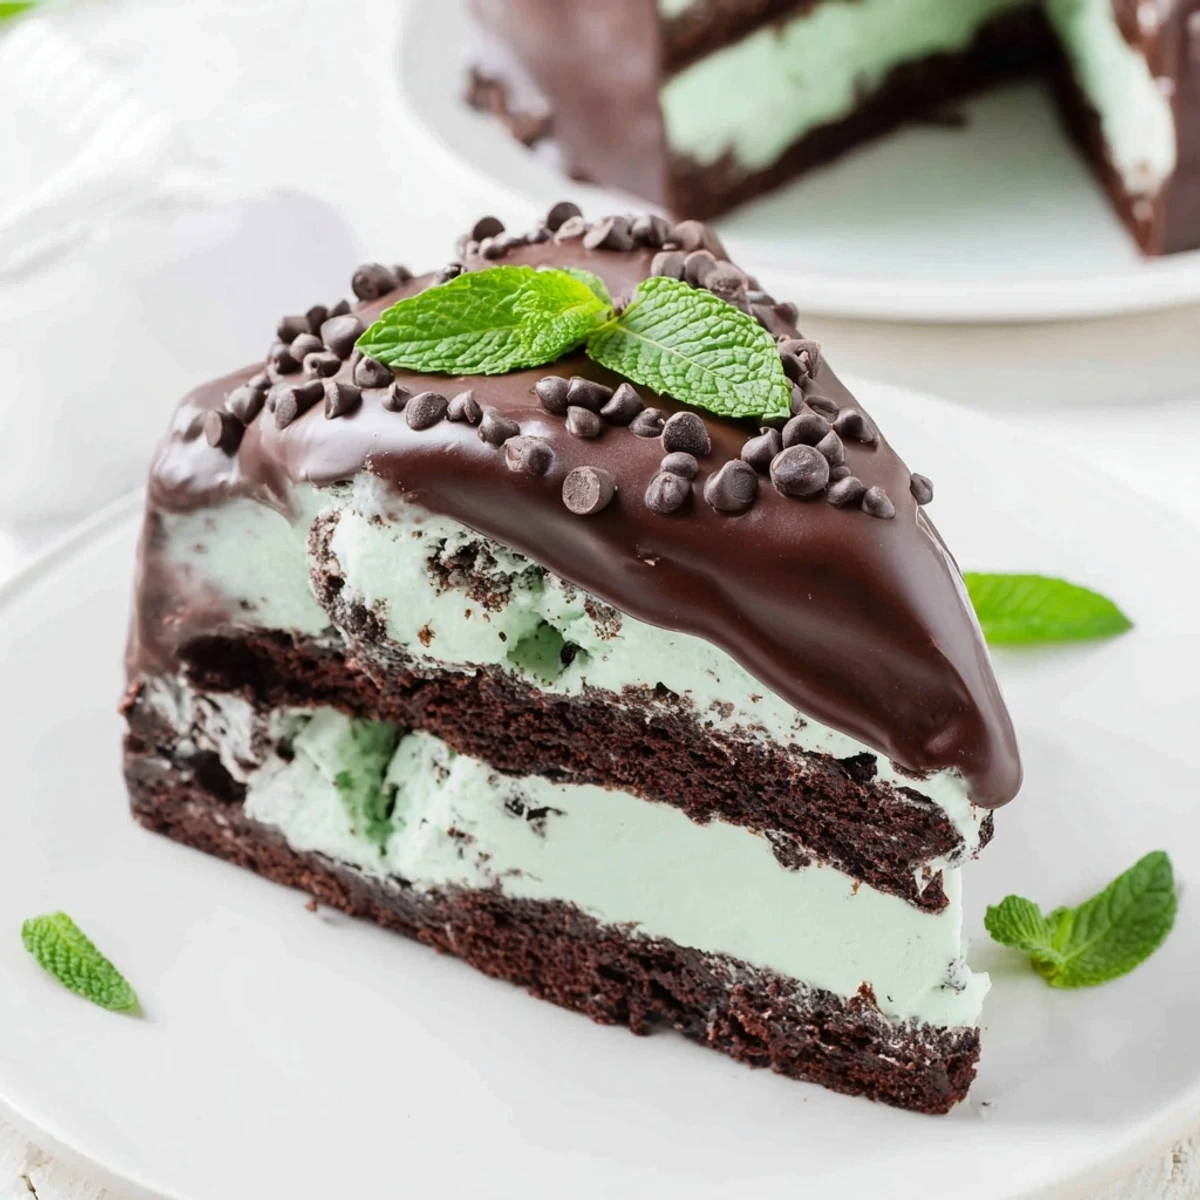
Save This indulgent dessert features a moist chocolate cake base topped with a creamy mint chocolate chip ice cream layer. Finished with a glossy chocolate ganache and garnished with mini chips and fresh mint, it offers a refreshing blend of flavors and textures. Preparation involves baking, layering softened ice cream, freezing for firmness, and adding a smooth ganache glaze for richness. Perfect chilled and sliced for gatherings.
My sister had been threatening to make this cake for years after seeing something similar at a restaurant, but somehow we never got around to it until her birthday last July. The kitchen was already sweltering, and I remember watching her sweat over the oven door, checking the chocolate cake with nervous energy. When she finally pulled it out, perfectly domed and smelling like brownies, I knew we were in for something special. Now it's become the only birthday cake request that matters in our family.
I once served this at a summer barbecue when the temperature hit ninety degrees and everyone was melting. The cake sat in its springform pan on the counter, looking impossibly elegant while we ate grilled corn and waited. When I finally brought it out, the ganache was still glossy from the freezer, and the first slice revealed those perfect green flecks against dark chocolate. Even the kids who claimed to hate mint ice cream went back for seconds.
Ingredients
- All-purpose flour (130 g): This builds the foundation that holds up everything else, so measure carefully or weigh if you can
- Granulated sugar (200 g): Don't reduce this—sugar keeps the cake tender and prevents it from becoming a sad hockey puck after freezing
- Unsweetened cocoa powder (50 g): Dutch-processed gives you that deep, almost black chocolate color and mellow flavor
- Baking powder and soda: The double lift is essential since this cake needs to be sturdy enough to support ice cream
- Salt (1/2 tsp): Cocoa needs salt to wake up, otherwise everything tastes flat and cardboard-like
- Whole milk (120 ml): The fat content matters here for keeping the cake moist through freezing and thawing
- Vegetable oil (120 ml): Oil stays liquid when frozen, unlike butter, which is crucial for texture
- Large eggs: Room temperature eggs incorporate better and create a more uniform crumb structure
- Vanilla extract (1 tsp): Pure extract makes a difference—imitation vanilla can taste weirdly artificial paired with mint
- Hot water (120 ml): This trick blooms the cocoa and creates an incredibly moist cake that bakes up thin but dense
- Mint chocolate chip ice cream (1.5 quarts): Let it soften for exactly 15 minutes—too soft and it collapses, too firm and you'll tear the cake trying to spread it
- Semi-sweet chocolate chips (170 g): Higher quality chips melt into smoother ganache with better sheen
- Heavy cream (120 ml): Don't try substituting milk—the fat content is what makes ganache set properly when frozen
Instructions
- Bake your chocolate base:
- Preheat that oven to 350°F and grease a 9-inch springform pan like your life depends on it, then line the bottom with parchment paper. Whisk the dry ingredients in a big bowl until they're completely uniform, then add milk, oil, eggs, and vanilla. Stir in the hot water last—your batter will look terrifyingly thin, like chocolate soup, but this is exactly right and produces the most tender crumb. Pour it in and bake 22 to 25 minutes until a toothpick comes out clean, then cool completely right in the pan.
- Layer the ice cream:
- Let your ice cream sit on the counter for about 15 minutes until it's spreadable but not melting. Pile it onto the cooled cake and smooth it with an offset spatula, working gently so you don't pull up cake crumbs. Freeze the whole thing for at least 3 hours—I usually leave it overnight so I don't have to think about timing.
- Make the chocolate ganache:
- Heat the cream until it's just barely simmering, watching carefully because cream boils over dramatically and makes a mess. Pour it over the chocolate chips and walk away for exactly 2 minutes—this feels wrong but trust the process. Stir gently until it transforms into glossy, smooth magic, then let it cool until it's spreadable but still fluid.
- Finish and serve:
- Pour that gorgeous ganache over the frozen ice cream layer, spreading it quickly and evenly before it sets. Return the cake to the freezer for 30 minutes minimum. When you're ready to serve, run a warm knife around the edge, release the springform, and slice with a knife you've dipped in hot water and wiped clean between cuts.
 Save
Save Last Christmas, my aunt who normally brings pumpkin pie everything showed up empty-handed because she'd tried making this the night before and forgot to line her pan. We laughed about it while eating her store-bought backup, but I remember thinking how even the most experienced cooks can get tripped up by the simple steps. Now she texts me photos every time she attempts it, and we've developed this running joke about whether she remembered the parchment paper this time.
Working Ahead Like a Pro
The beauty of this cake is that every component freezes beautifully, which means you can bake the cake layer weeks in advance and wrap it tight in plastic. I've learned through frantic dinner party prep that having the cake baked and cooled in the freezer takes half the stress out of the equation. Just thaw it slightly before spreading the ice cream, or you'll get those frustrating frozen chunks that refuse to smooth out evenly.
Getting the Ganache Just Right
Temperature is everything with ganache, and I've ruined more batches than I care to admit by rushing the cooling process. Too hot and it slides right off the ice cream, pooling around the edges instead of coating the top properly. Let it cool until it feels like warm pudding—you should be able to drizzle a spoonful back into the bowl and see it mound slightly rather than disappear completely.
Serving Secrets
A hot knife is non-negotiable for clean slices that show off those beautiful layers on the plate. Dip your knife in hot water and wipe it dry between every single cut, even though it feels tedious. I keep a tall mug of hot water next to my cutting board specifically for this purpose.
- Take the cake out 30 minutes before serving and let it soften on the counter—this makes all the difference between a pleasant creamy texture and something that feels like eating a chocolate-flavored snowball
- Leftovers keep surprisingly well for about a week if you cover them tightly, though the texture gets slightly icier
- For parties, garnish each slice individually rather than the whole cake—it looks more intentional and stays fresher longer
 Save
Save There's something deeply satisfying about serving a dessert that looks like it came from a bakery but actually came from your freezer and a little bit of patience.
Recipe FAQs
- → Can I use gluten-free flour for the cake?
-
Yes, substituting with a 1:1 gluten-free flour blend works well without compromising texture.
- → How do I ensure smooth ganache topping?
-
Heat the cream until just simmering before pouring over chocolate chips, then stir gently until fully combined and glossy.
- → What’s the best way to get clean slices?
-
Run a sharp, warm knife around the edges before releasing the springform pan and slicing to prevent sticking.
- → Can I replace the mint chocolate chip layer?
-
Yes, try chocolate or fudge ripple ice cream for a different flavor contrast.
- → How long should the cake freeze before serving?
-
Freeze the layered cake for at least 3 hours to achieve firm texture and allow ganache to set properly.
- → Is this suitable for vegetarians?
-
Yes, the ingredients used comply with vegetarian diets, including eggs and dairy products.