 Save
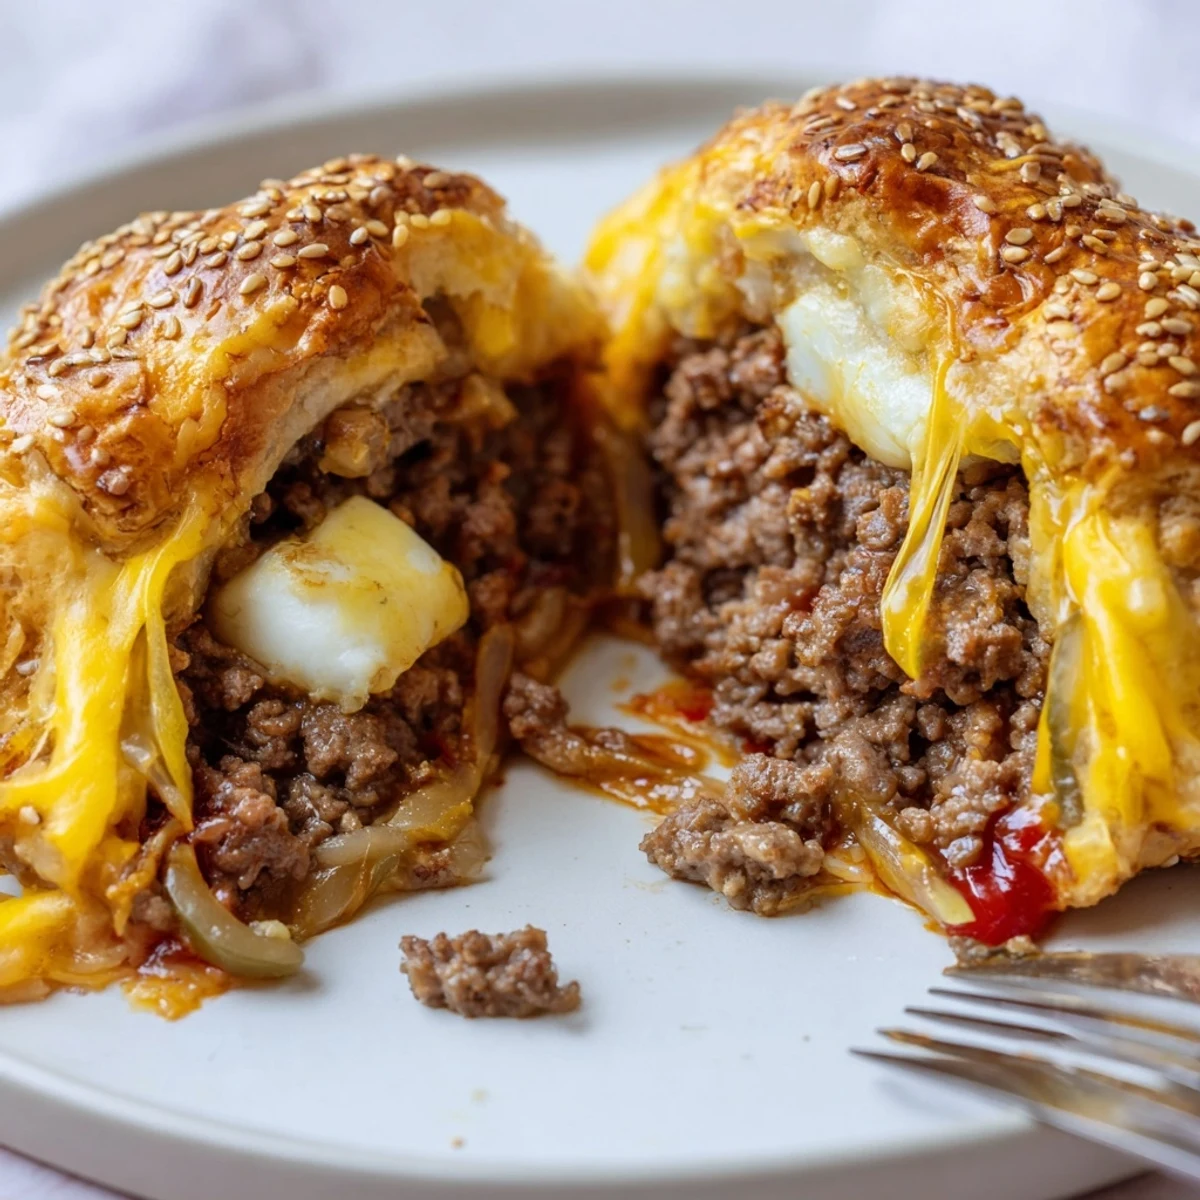
Save Make eight golden, biscuit-wrapped cheeseburger bombs in about 50 minutes. Start by sautéing diced onion until translucent, then brown ground beef with garlic powder, salt and pepper and drain. Stir in ketchup, mustard and Worcestershire, cool slightly. Place a tablespoon of the beef and shredded cheddar on each flattened biscuit, top with a mozzarella cube, seal, egg-wash and sprinkle sesame seeds. Bake at 200°C (400°F) for 15–18 minutes until deeply golden; rest briefly before serving with favorite dipping sauces.
When my neighbor dropped by with a stack of homemade pickles one summer afternoon, I started tinkering in the kitchen to invent something suitably fun to use them in. The result was these Cheesy Cheeseburger Bombs: little biscuit parcels bursting with beef, molten cheese, and all the joy of a backyard cookout. The sizzle of beef in the pan always takes over the kitchen, and that first whiff somehow makes even a weeknight feel like a celebration. I never expected snack food to become such a showstopper, but these have a way of disappearing faster than any main course.
One Friday last fall, I brought a tray of these bombs to a movie night, half-worried that they'd be too messy or fussy to eat on the couch. Instead, quiet fell over the room except for the sounds of happy munching and a dozen requests for the recipe before the credits rolled. It's one of those dishes that instantly makes you everyone's favorite guest.
Ingredients
- Ground beef: Go for fresh, not frozen beef if you can; it browns better and stays juicier inside the biscuit.
- Shredded cheddar cheese: Real sharp cheddar gives more flavor punch and melts perfectly—don’t be shy loading it in.
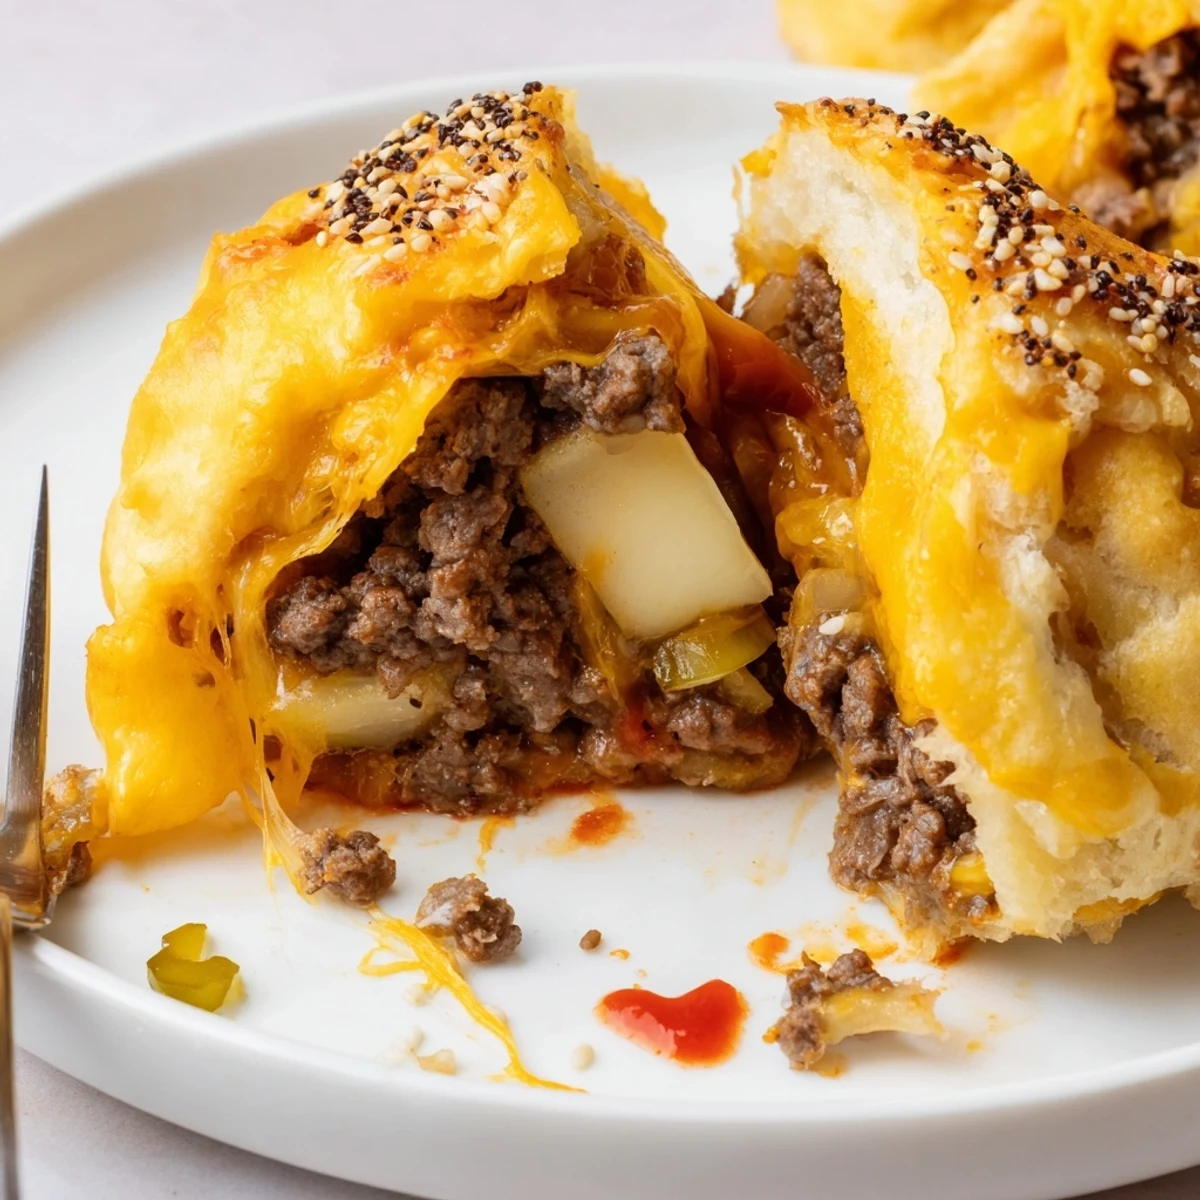
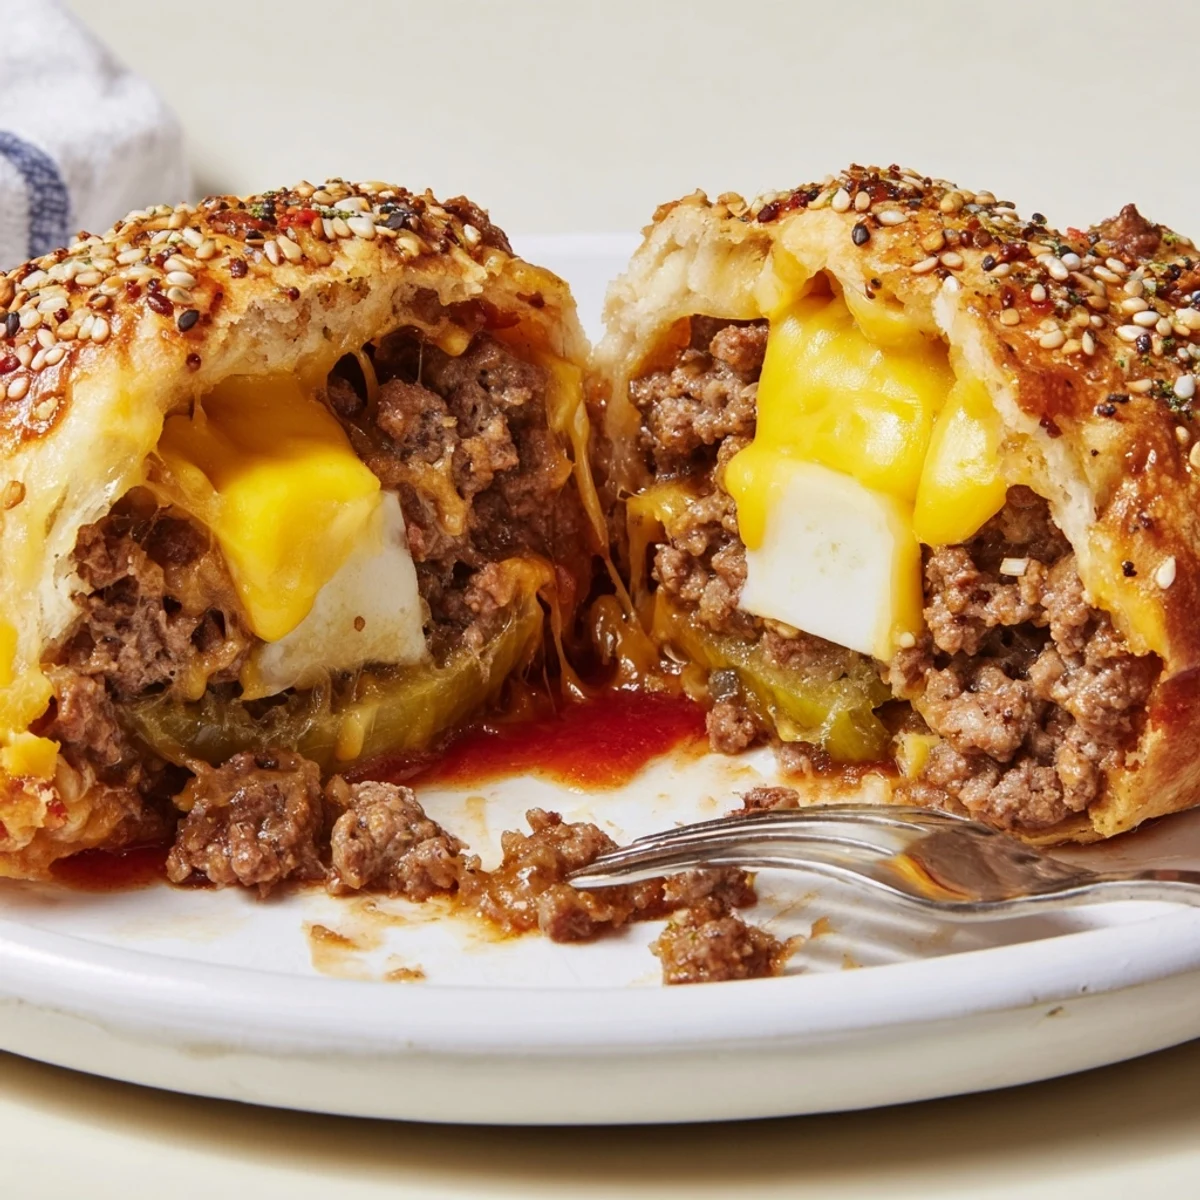
- Mozzarella cubes: Each cube is a gooey surprise—freeze the cubes for ten minutes so they melt, not ooze out.
- Small onion: Cook until just translucent for sweetness without overpowering the beef.
- Pickle: Totally optional but adds a little tang that wakes up every bite—my friend swears by dill but I love bread-and-butter pickles.
- Refrigerated biscuit dough: The shortcut ingredient that lets you pull this off on a whim; don’t overwork, just gently press flat.
- Ketchup & Mustard: Classic burger condiments baked right into the filling for extra juiciness.
- Worcestershire sauce: A splash deepens the savory edge of the beef; don’t skip it.
- Garlic powder, salt, pepper: Basics that make everything taste a notch brighter and more like, well, a burger.
- Egg (beaten): The shiny, golden finish on top—an egg wash is the oldest bakery trick I know.
- Sesame seeds: Sprinkle with abandon for a true “burger bun” vibe; they toast up fragrant in the oven.
Instructions
- Get everything ready:
- Preheat your oven to 200°C (400°F) and line a baking sheet with parchment so nothing sticks (trust me, cheese tries its best!).
- Brown the beef:
- Shove diced onions into a skillet; when you hear them quietly sizzling and the kitchen smells sweet, add the beef, garlic powder, salt and pepper, stirring until the pink is gone and it’s crumbly.
- Stir in flavor:
- Once the beef’s no longer pink, add ketchup, mustard, Worcestershire, and pickles; stir and take the skillet off the heat—let it cool so it doesn’t melt your dough.
- Fill the biscuits:
- Take each biscuit and gently flatten into a wide round. Drop a generous spoonful of beef mix in the center, sprinkle cheddar, and set a mozzarella cube right on top ready for molten goodness.
- Seal into bombs:
- Pull the edges up, pinch closed tight (no peeking cheese!), and set seam-side down spaced apart on the prepared tray.
- Top & finish:
- Brush each bundle with beaten egg for shine, then shower with sesame seeds—don’t skimp, they make every bite look bakery-fancy.
- Bake them golden:
- Into the oven—watch for deep golden brown, about 15-18 minutes. The smell will have everyone wandering into the kitchen impatiently.
- Cool, then serve:
- Give them a few minutes to settle so you don’t burn your tongue. Serve with little bowls of burger sauce for dipping, and watch them vanish.
 Save
Save The first time I made these, my niece snuck back into the kitchen for 'just one more' before the rest of us even finished dessert. That was the moment I realized they weren’t just fun—they’d become the thing everyone looked forward to most at our family get-togethers.
Making It Your Own
The fillings are endlessly customizable—sometimes I toss in a dollop of barbecue sauce, or a few crispy bacon bits if I’ve got some left over. Letting younger helpers pile in whatever odds and ends they like turns it into a build-your-own dinner nobody complains about. A jalapeño or two hidden inside adds just enough mischief to keep things interesting.
Serving Suggestions to Maximize the Fun
These bombs are fantastic with a trio of sauces: one classic (ketchup), one zippy (mustard or sriracha mayo), and one creamy (ranch or a garlicky aioli). I love putting them out on a board with extra pickles and crunchy vegetables—it somehow feels like a picnic even indoors. No plates required, just napkins and good company.
What to Watch Out For in the Kitchen
Sometimes the urge to add more beef or cheese is strong—resist, or you’ll struggle to seal the edges and will lose that perfect molten center. Cold cheese cubes are key: keep them in the fridge until the last moment to avoid leaks. The egg wash really makes them bakery-golden, but skip it if you’re out—just expect less shine.
- Work quickly so the dough stays easy to shape.
- Use parchment for stress-free cleanup every time.
- Don’t stack the bombs after baking—they steam and go soggy.
 Save
Save When these are baking, the kitchen smells like a cross between a burger joint and a bakery, and that’s just about perfect. I hope this recipe brings as much grinning and finger-licking to your table as it does to mine!
Recipe FAQs
- → How can I prevent the cheese from leaking out?
-
Make sure the beef filling has cooled slightly before filling, use a small mound of cheese, and pinch the biscuit edges firmly to seal. Chilling assembled pieces briefly before baking helps set seams.
- → What other cheeses work well?
-
Sharp cheddar and mozzarella combine for melt and flavor, but pepper jack adds heat, Colby or Monterey Jack offer milder melt, and smoked cheeses bring depth. Use a firm cube for the center for a clean melt.
- → Can these be prepared ahead or frozen?
-
Assemble and place on a sheet pan, then refrigerate for up to 24 hours before baking. For longer storage, freeze unbaked bombs on a tray, then transfer to a bag; bake from frozen, adding a few extra minutes to the time.
- → How do I make a gluten-free version?
-
Swap the refrigerated biscuit dough for a certified gluten-free biscuit or dough alternative and check all condiments for gluten-containing ingredients. Baking time may vary slightly depending on dough density.
- → How can I ensure even cooking?
-
Keep each portion uniform in size and avoid overstuffing. Arrange bombs spaced on a parchment-lined sheet and bake until an even deep golden color develops; 15–18 minutes is typical at 200°C (400°F).
- → What are good dipping sauces to serve with them?
-
Classic ketchup and yellow mustard, burger sauce, sriracha mayo, or a tangy pickle-based relish complement the beef and cheese. Serve a few options for variety.